In the process of switching my mounted overhead video setup from a backdrop bar to the Elgato Multi-Mount, I had to make one significant shift – filming upside-down, since the camera is now attached to the back of the desk instead of mounted above from the front. Unfortunately, that means all of my footage needs to be rotated before being usable in editing programs.
In Final Cut Pro for Mac, you can easily rotate clips once you’ve added them to the timeline. However, I’m not actively building a story yet, and I’m instead using the Browser to organize my footage into individual clips using in/out points and Favorites. For a long recording like an unboxing, I can turn an hour of footage into a full set of individual moments as clips, all timed exactly for the action, renamed as needed, and split apart as separate entities in the Browser.
This process and my footage means, by default, all my Browser clips are also upside-down, and at first glance this seemed like a big problem for my editing style – timeline editing is very different than clipping in the Browser, and I might be out of luck.
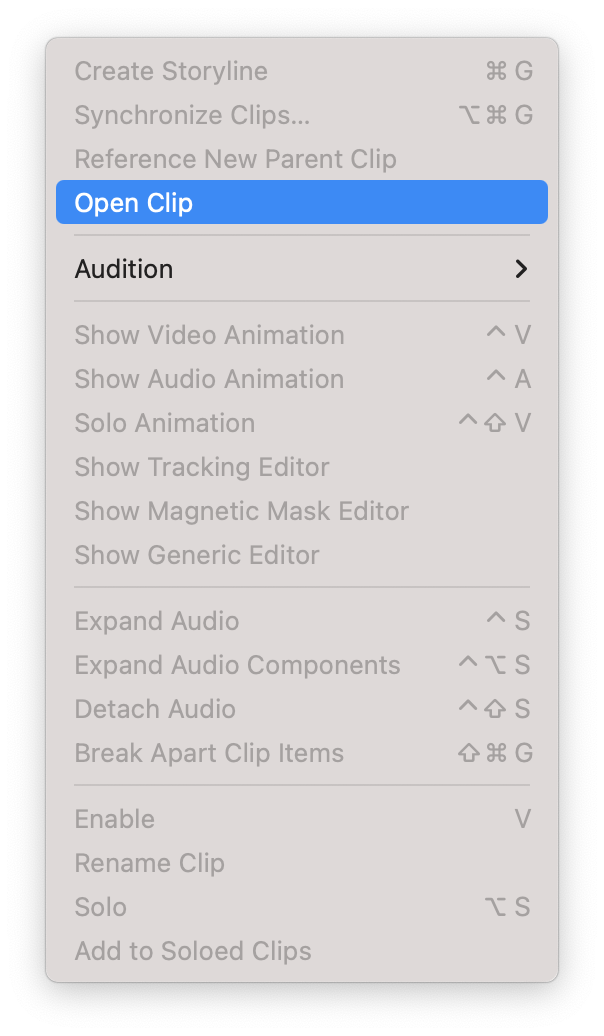
However, thanks to “2old2care” on Reddit (great username), the solution lies in the “Open Clip” menu option, which I’ve never used before:
Yes, you can invert the clip in the browser. Select the clip, then under “Clip” menu select “Open Clip”. You can then go to transform and rotate the clip 180º. I don’t know of a way to create a batch in FCP to do this, although it can be done for the original clips using Compressor.
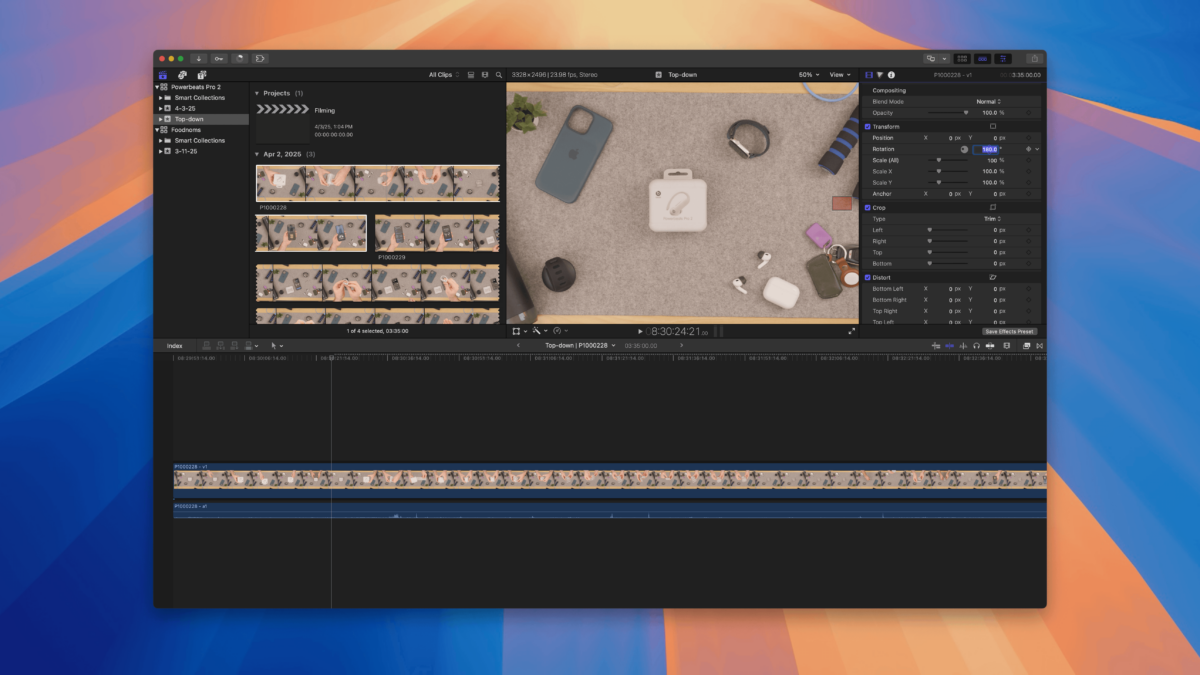
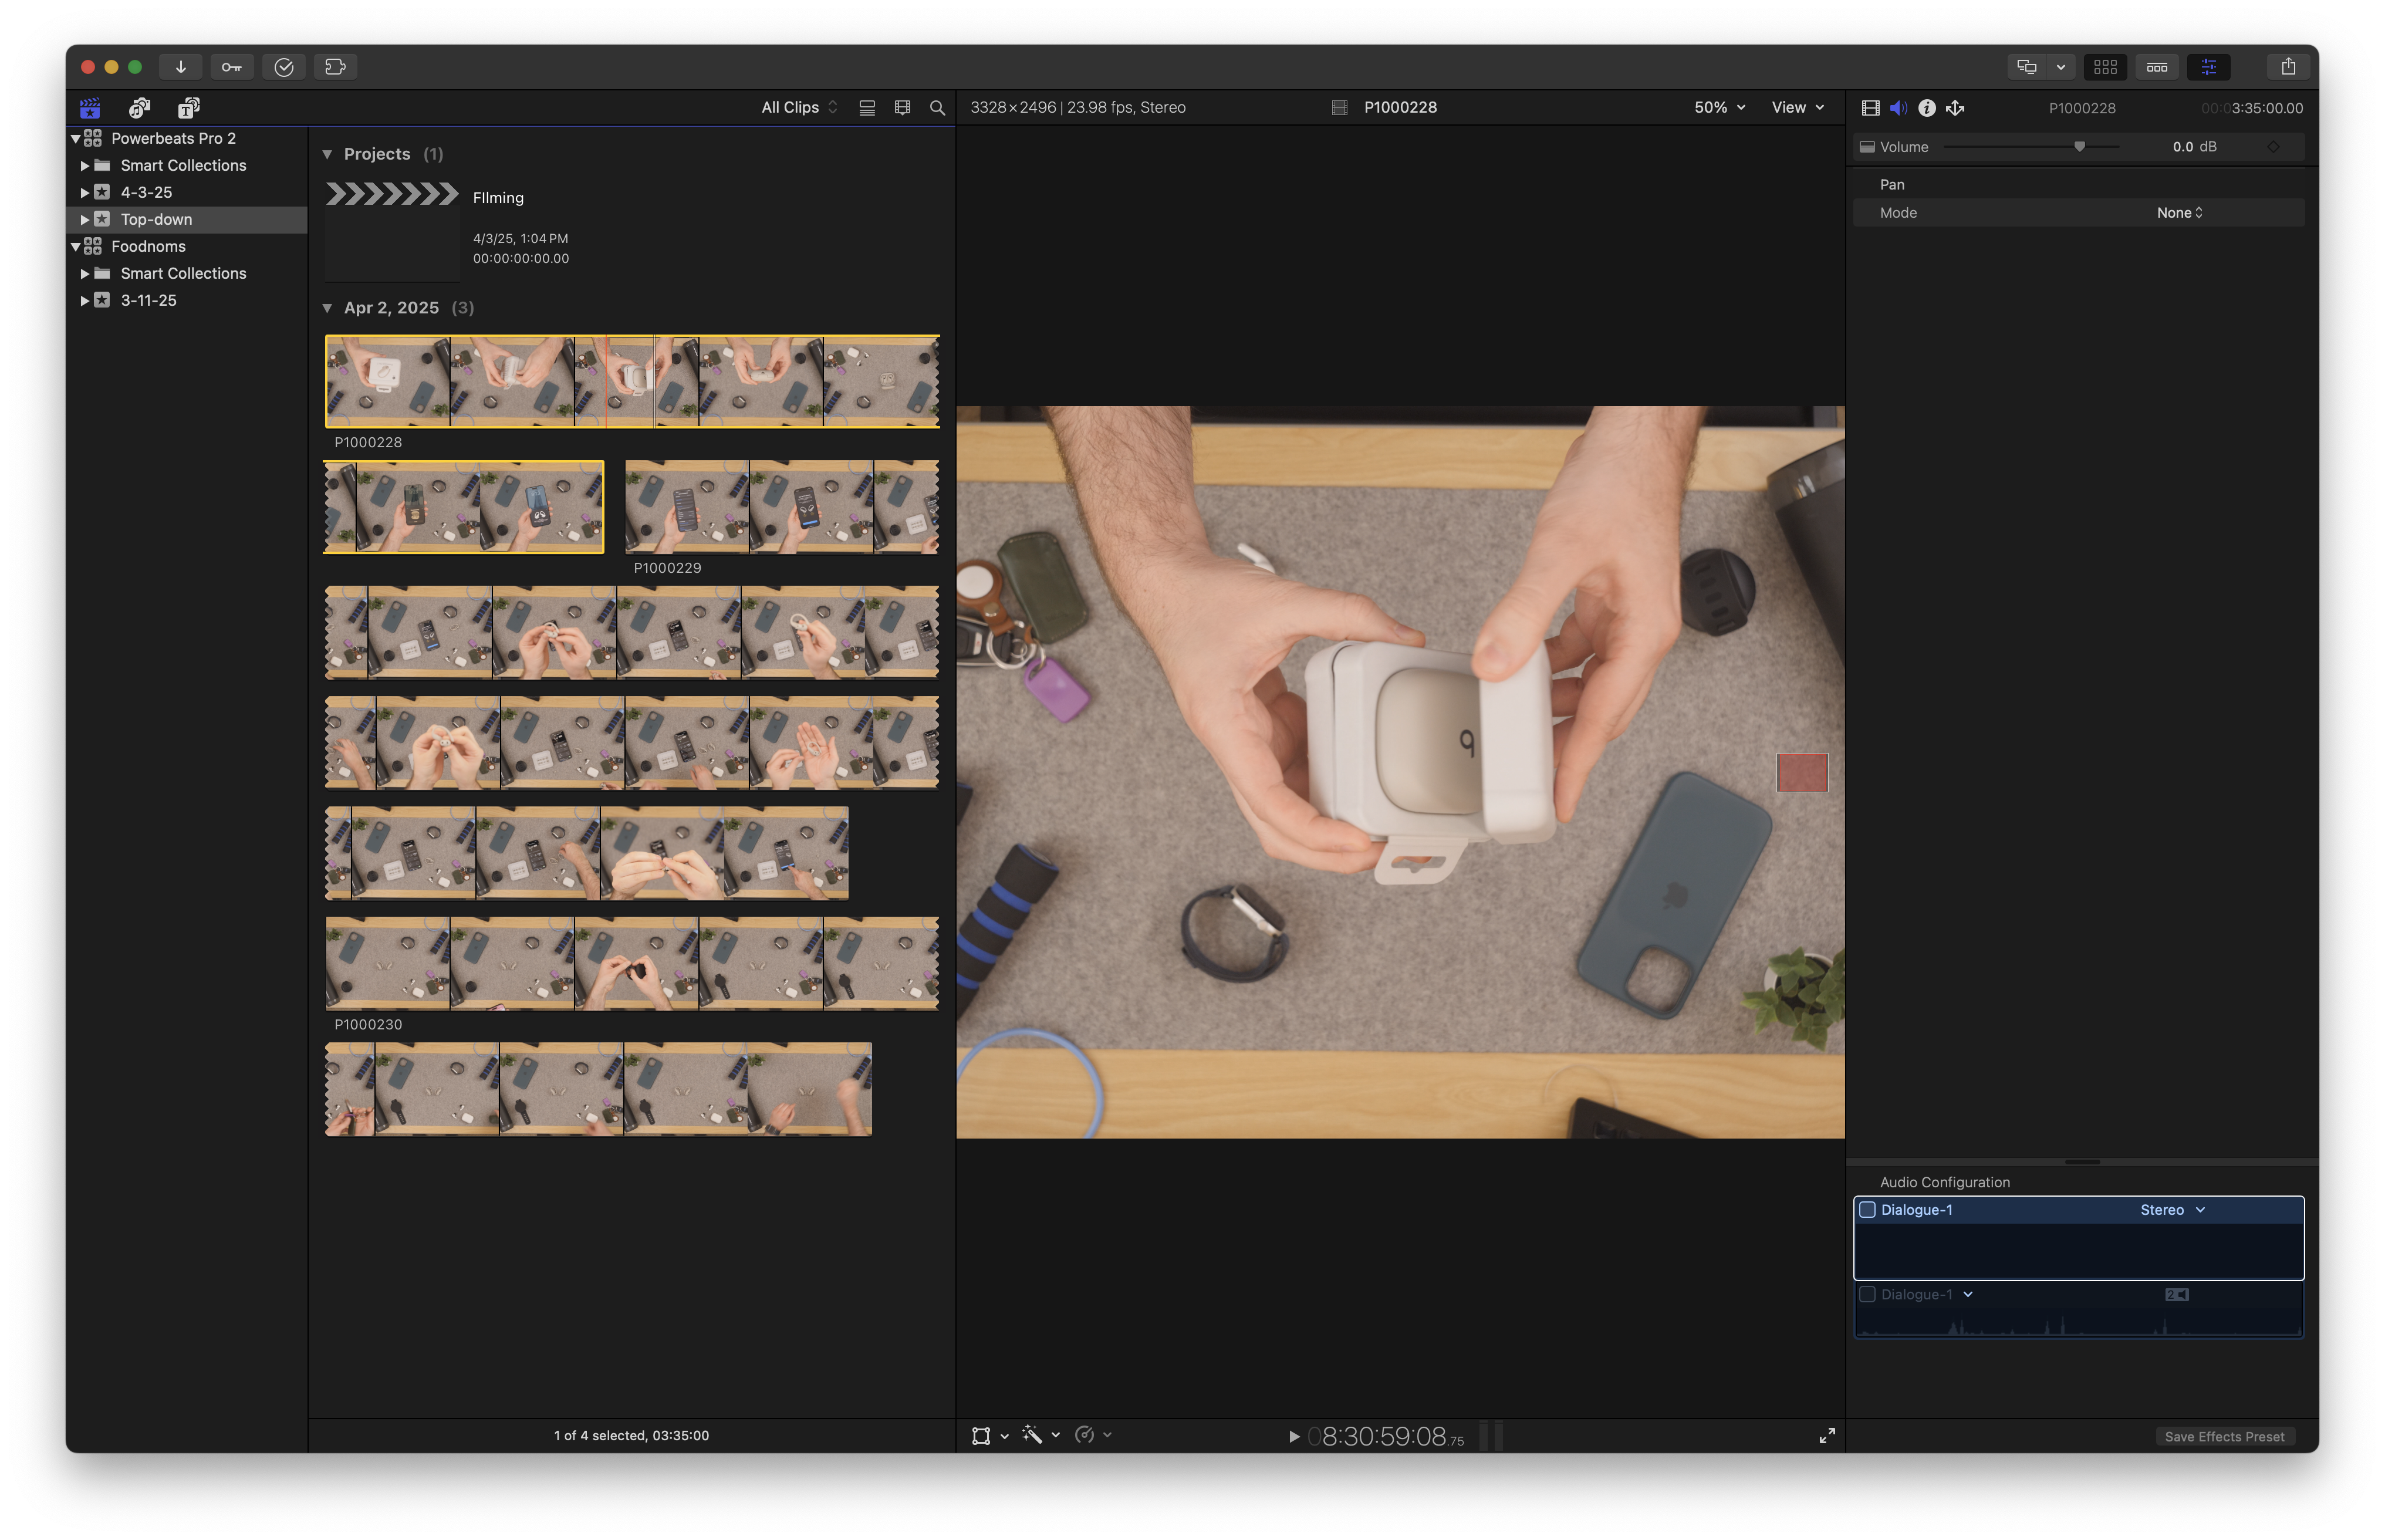
To save myself the trouble of remembering later, I took screenshots of the process – here’s my setup in Organize mode (under Window > Workspaces > Organize):
How to rotate clips within the Browser using Final Cut Pro
- Select the clip you want to rotate – use the filmstrip to identify which files were filmed upside-down.
- In the Menu Bar, navigate to Clip > Open Clip, which has no keyboard shortcut. Optionally, assign a keyboard shortcut under Final Cut Pro > Command Sets > Customize (or use ⌥ + ⌘ + K / Option + Command + K to customize immediately).
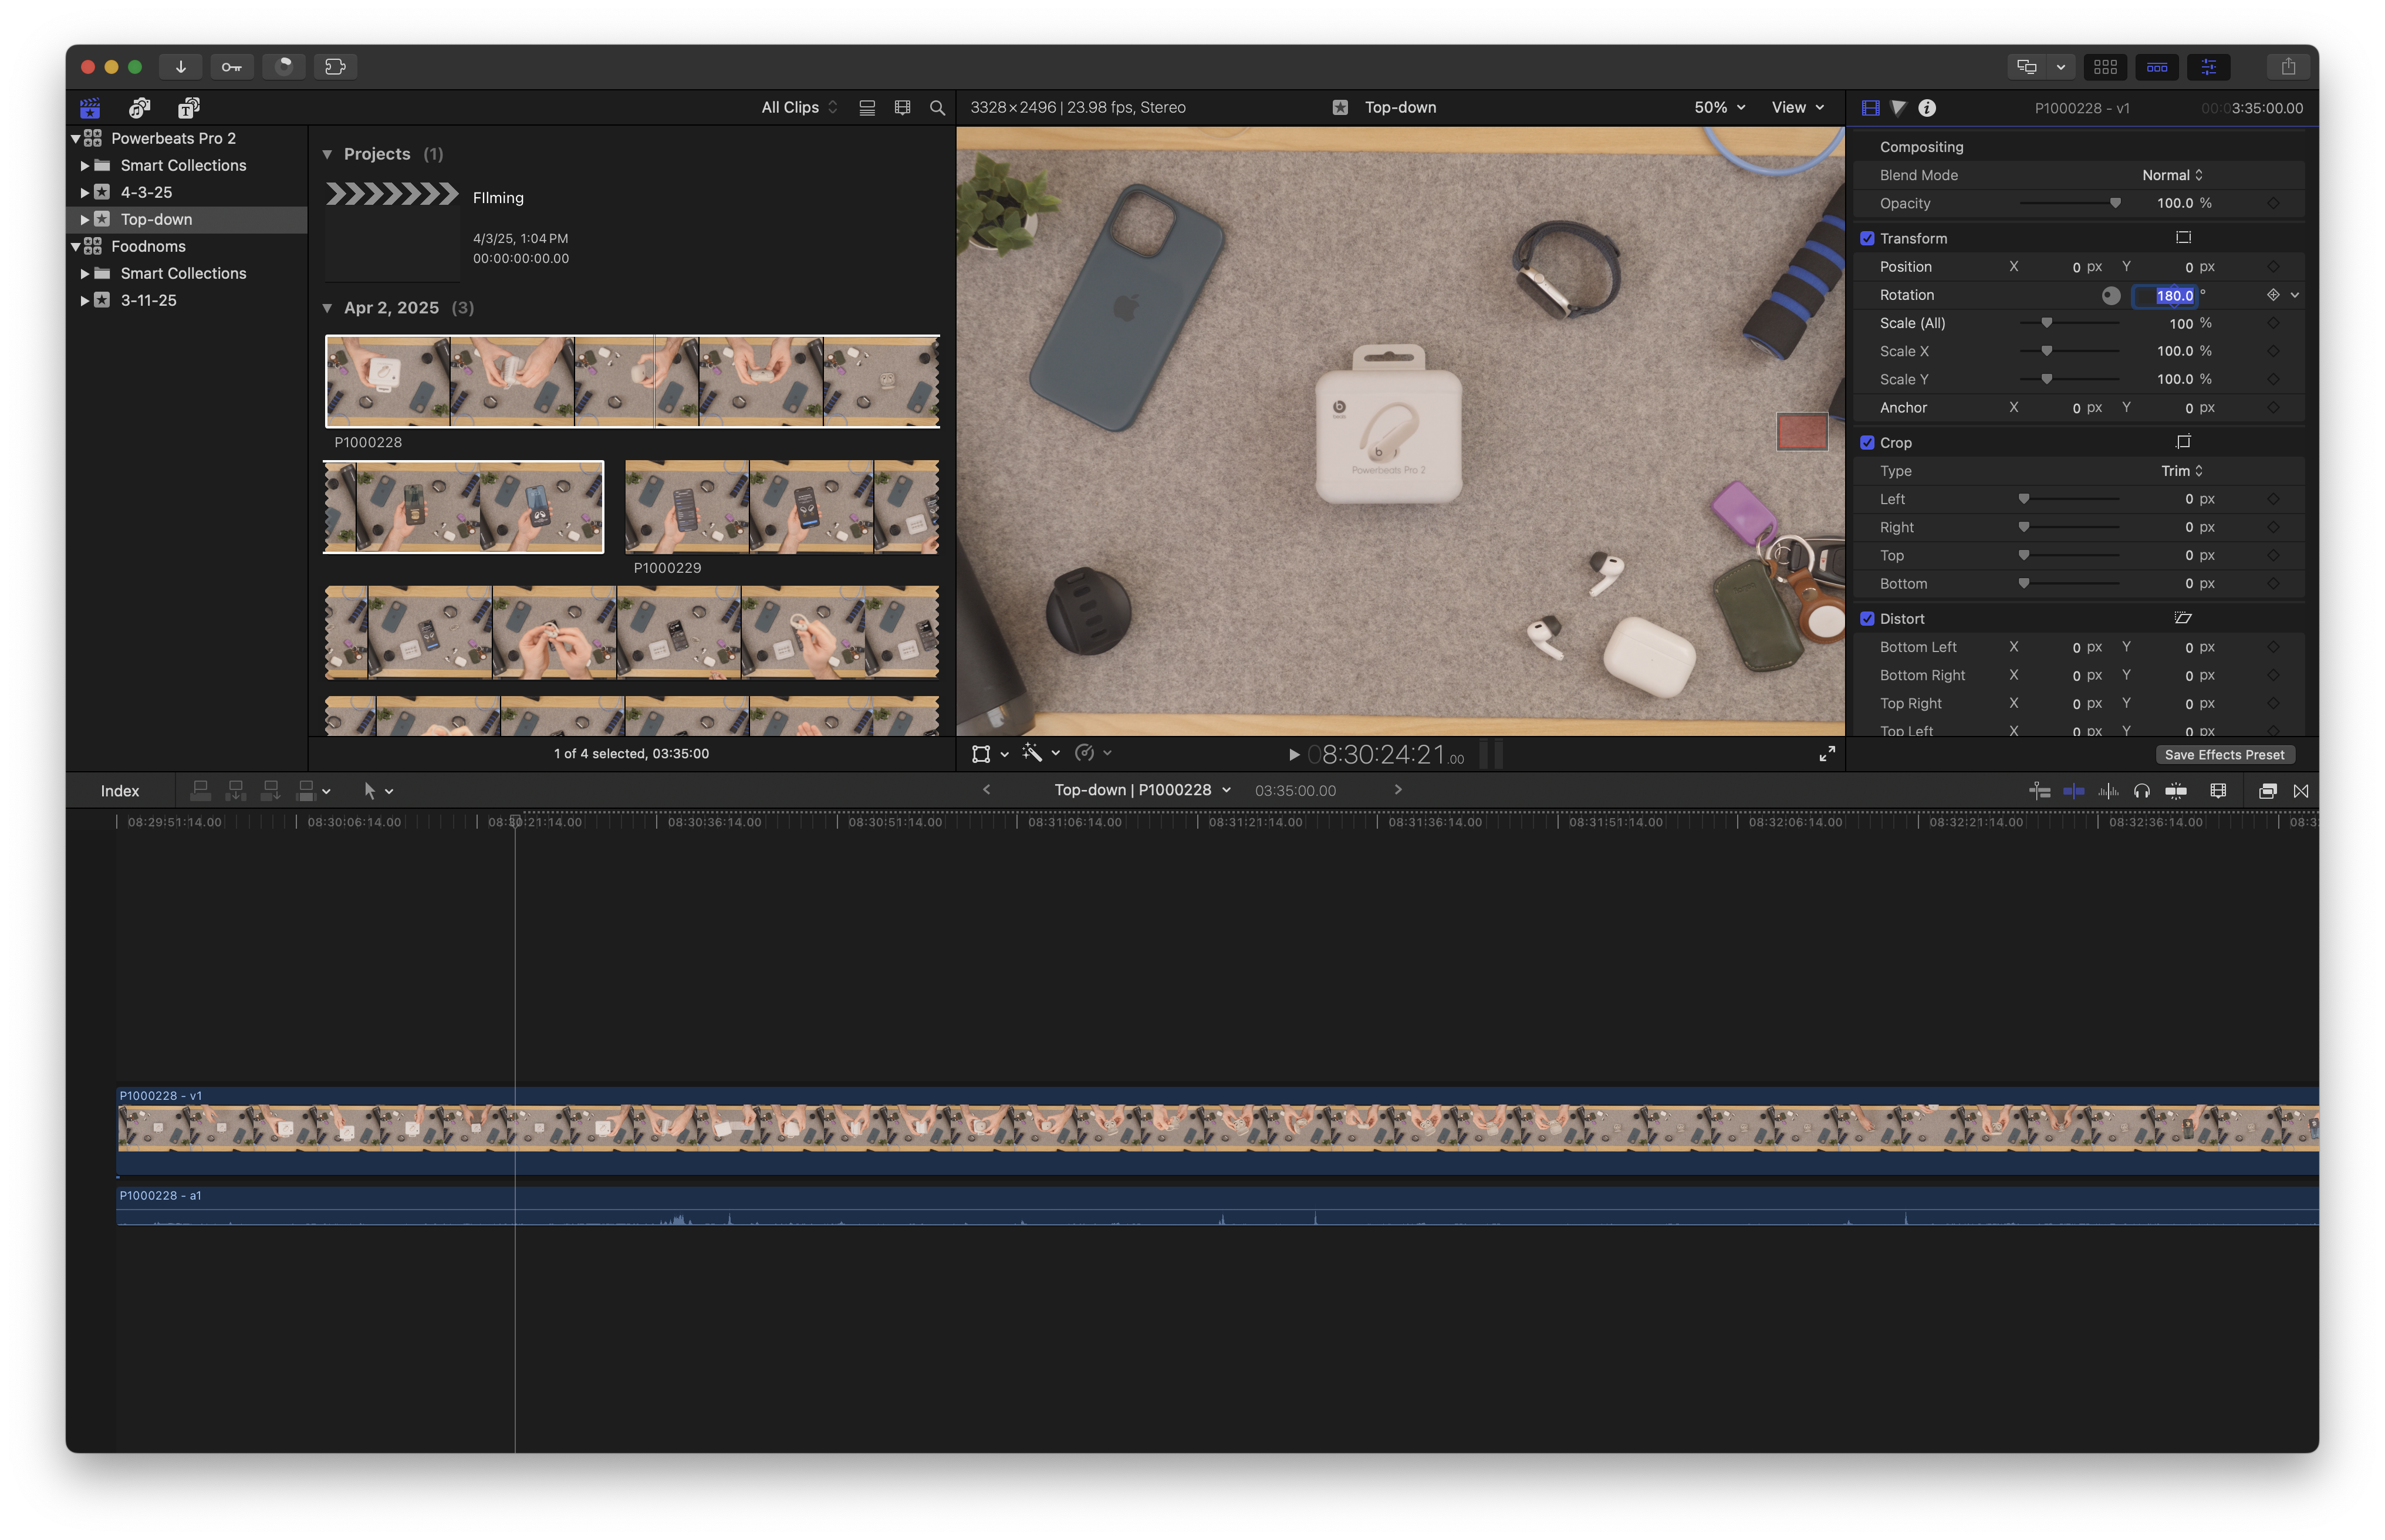
- In the Final Cut Pro window, the selected clip will open in its own timeline view. In the Inspector, select Transform and change the Rotation from 0° to 180°.
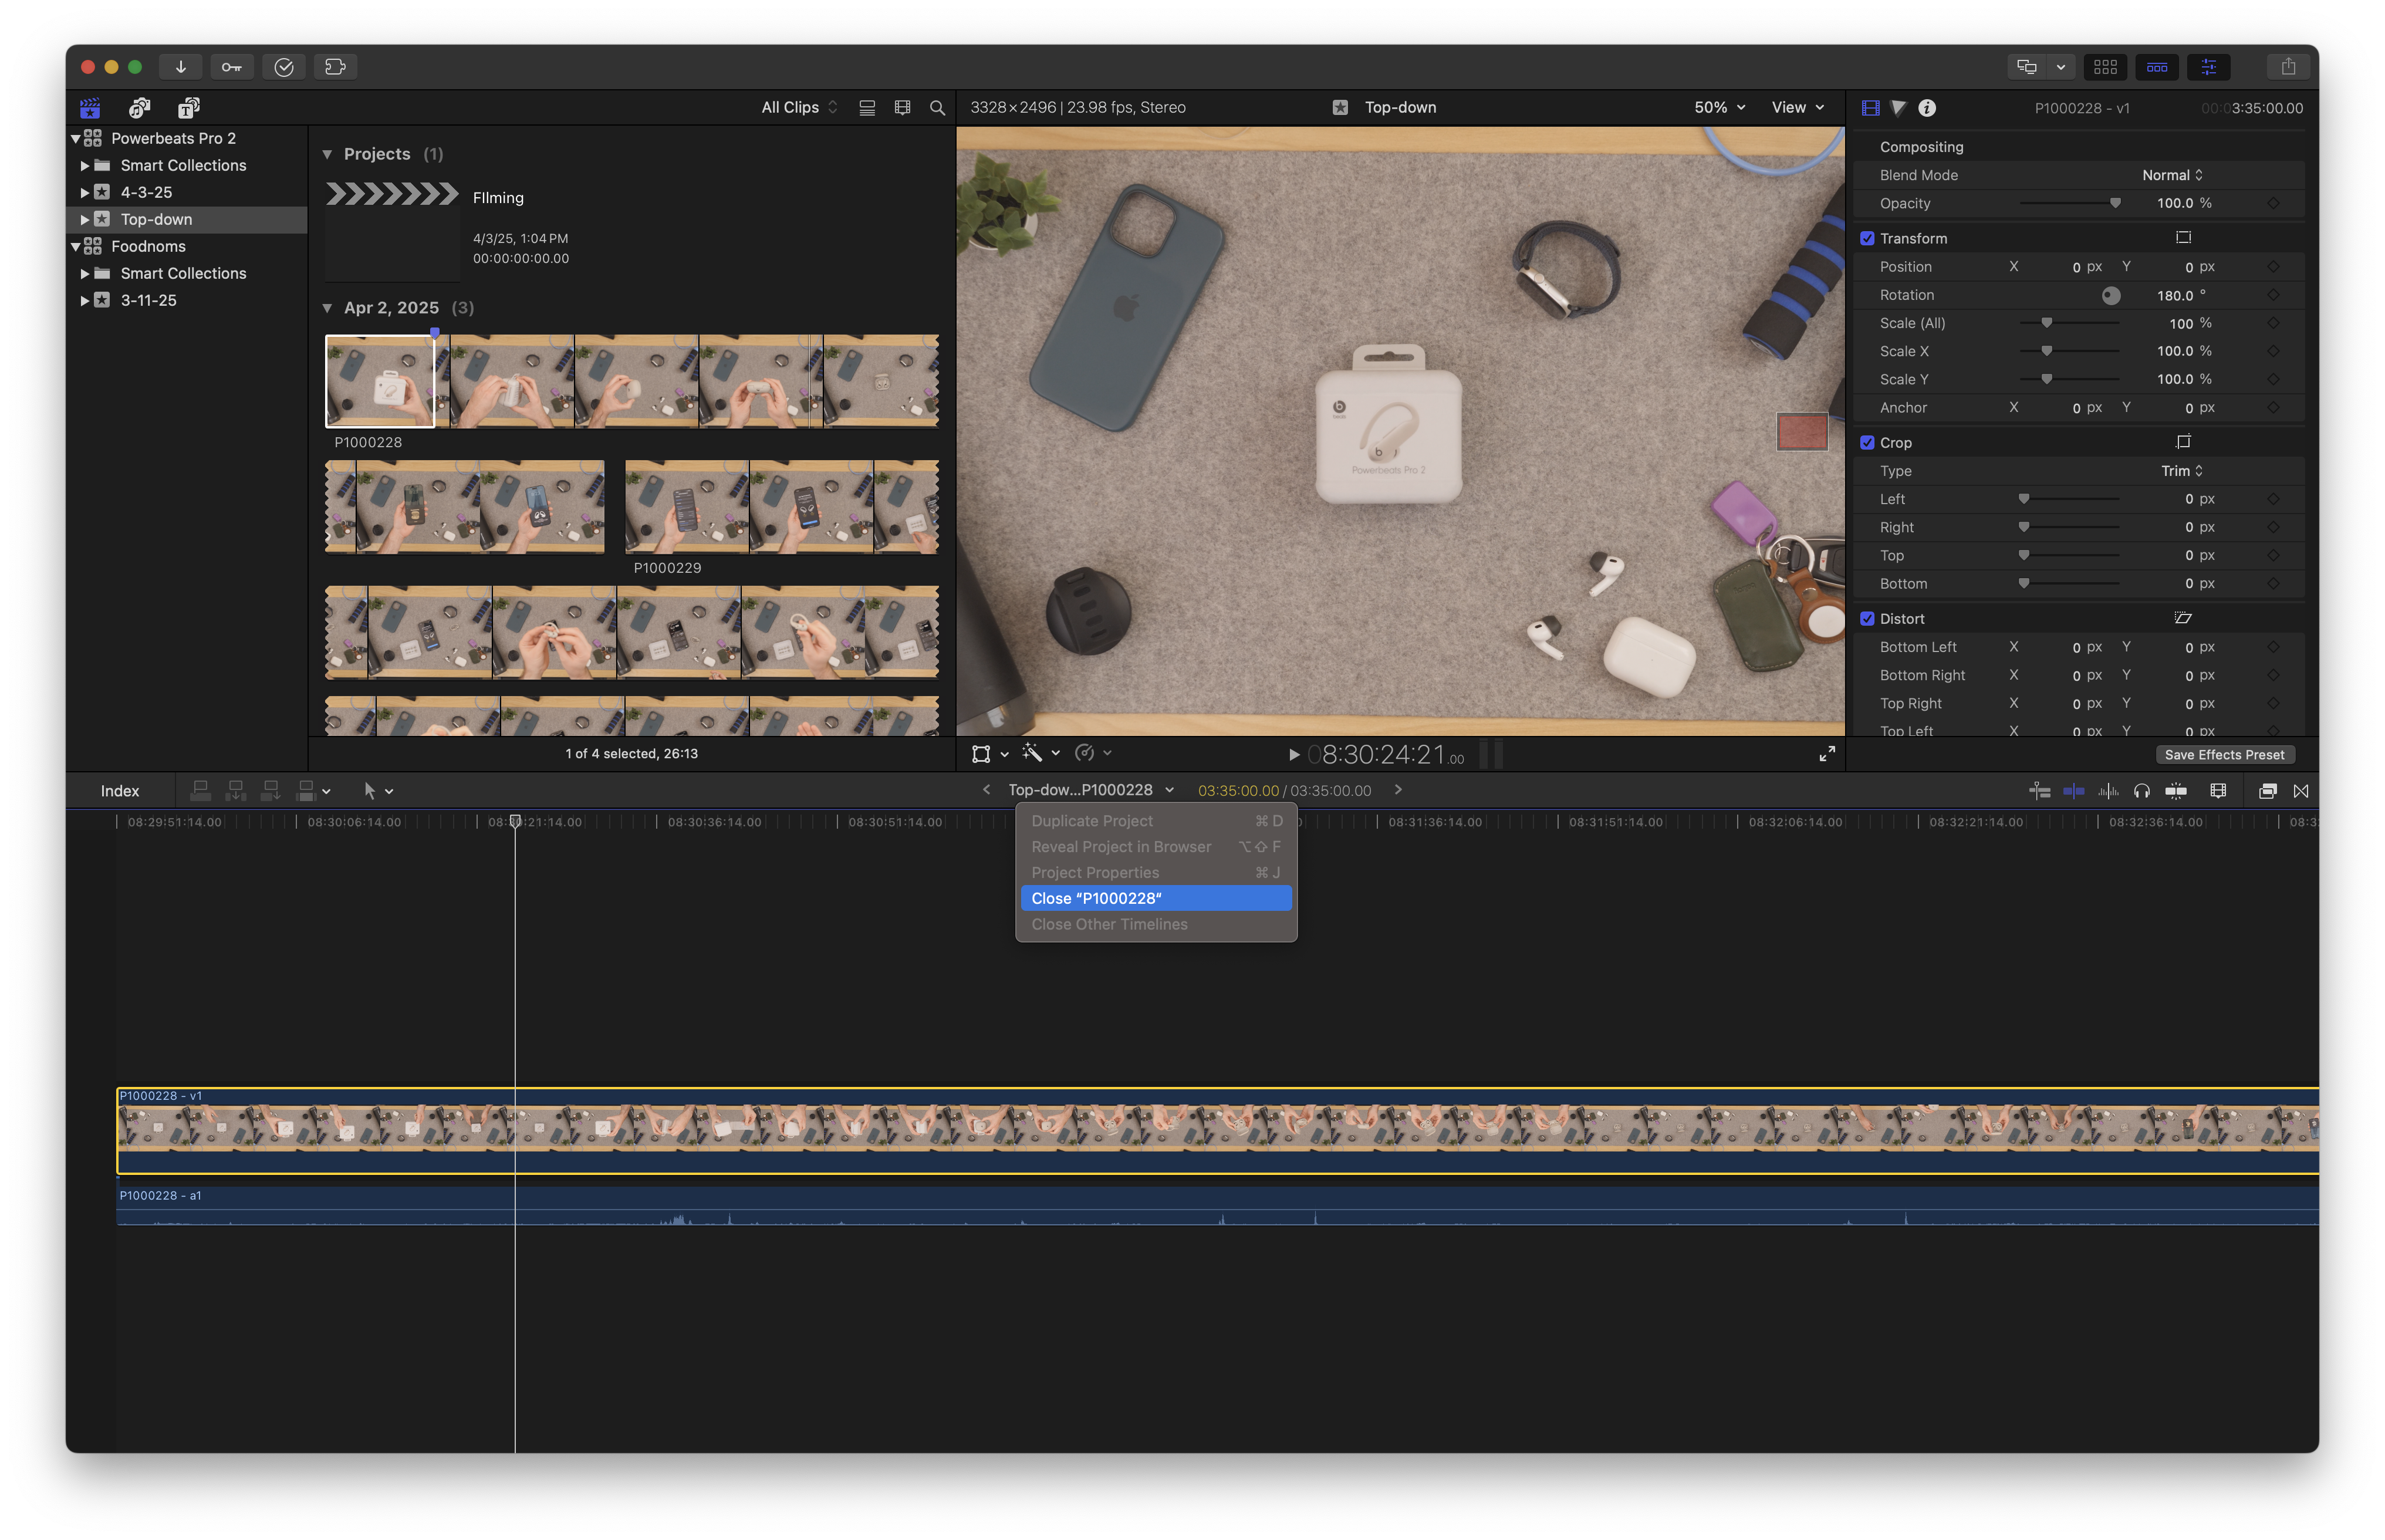
- In the center of the window, find the clip name and click the dropdown arrow next to it to reveal a context menu – close the clip to return to the full Browser view. The filmstrip will show the flipped clip as you scroll, however it will continue to show the original upside-down version in the static filmstrip until you leave the project and navigate back/refresh the window.
- Repeat for each upside-down clip.
As 2old2care mentioned, batch-processing files like this would be a more ideal solution – I’ll update this post if I find one.
Check out the source on Reddit, get the Multi-Mount from Elgato, and get Final Cut Pro for Mac from Apple.