If you’ve picked up Apple’s HomePod in the past few weeks and tried to use iTunes on your Mac to Airplay something to the speaker, you probably got blasted with the music playing at full volume.
This occurs since HomePod uses iTunes’ in-app volume slider to adjust its levels rather than your Mac volume, and iTunes is usually at 100% because the hardware keys are used control my computer’s overall sound instead1. Plus, if I want to change the volume on HomePod after the music starts, I have to go into iTunes and drag the slider – you can’t turn it down that quickly.
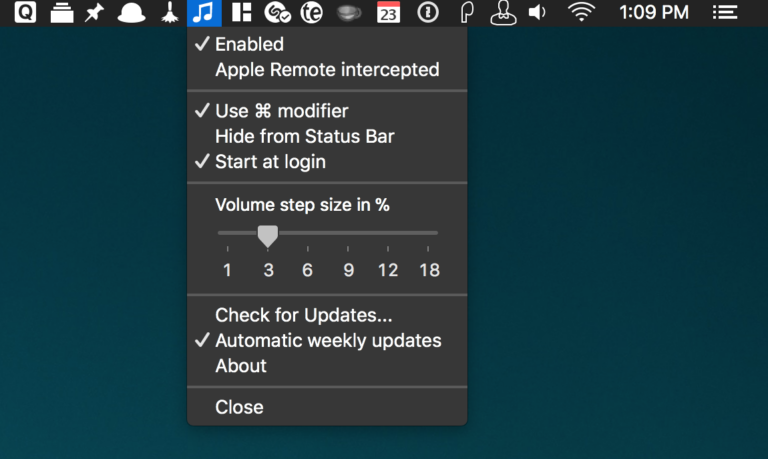
To get around this, I installed a Mac app called iTunes Volume Control that’s available on GitHub. Created by Andrea Alberti, it’s an app that lives entirely in your menu bar and changes the Mac’s hardware volume keys to control iTunes instead. When it’s running, it can entirely take over mute, volume up, and volume down – or, you can set it so you have to hold a modifier key like Command before hitting the keys. I use the latter option, so I can control my Mac volume with the keys normally and then use ⌘ + or ⌘ – to adjust iTunes when I need to.
Once you’ve installed the app, you’ll find it’s much better experience playing music from iTunes with HomePod as your speaker. I set iTunes Volume Control to launch at login, so it’s basically always running when I use my computer and I never have to turn it on when I need it2. I’ll usually open iTunes, use ⌘ – to turn down the volume, then pick my song and AirPlay to my HomePod.
iTunes Volume Control also provides an option to change the step size for each press, so the volume can be changed in more specific intervals – you can set it go up 3% each time, for example, rather than the default 10% at a time. This gives you fine-grained control of the HomePod volume, right from your keyboard.3
I could see improving this setup using iTunes and AppleScript – you could set up a command to launch iTunes already set to 30% and set to AirPlay to the HomePod, avoiding the setup process each time I want to listen from my Mac on my HomePod. However, I have no experience there and that’s a project for another day.
The best part of this setup is that iTunes Volume Control is entirely free to download and use. Check out the documentation first, but use this link to get the app and start controlling your HomePod from your Mac.
- Instead of adjusting the levels in iTunes and on your Mac separately, it’s much more common to leave iTunes at 100% and change the volume on the whole computer instead. ↩
- I normally hide it in the menu bar using Bartender, so I can click on the Bartender icon to reveal it but keep it away from view otherwise. ↩
- I do the same thing with HomePod normally by using my Apple Watch. Once you change the source in Control Center on your iPhone to the HomePod, the Now Playing controls show up on Apple Watch and let you control the smart speaker from your wrist. ↩